Learning Rust - The Toolchain (part 2)
The previous post about the Rust toolchain covered the very basics - thing you really can't do without. This post covers other parts of the toolchain that you *should* use (in my opinion), but aren't strictly required.
If you missed the previous posts, here they are:
Alright, let’s dive in! (Suggested track: “Rusty Cage - Soungarden”)
But I don’t like lint and formatting rules!
Okay, for private projects you might not want all this… structure (definitely not my preference but hey, suit yourself). However, these types of tools end up saving a lot of time and grief on a project with many contributors. Most commercial and open source environments are collaborative efforts, and nobody likes to review PRs that have formatting or simple coding issues. Why bother (expensive) humans with this work when a computer can do it?
You can also customize the rules specifically for the project, and/or bend the rules for specific sections of code. Since these blog posts are geared towards people new to Rust, this won’t be covered here.
Clippy
No, this isn't that clippy that some of us older folks remember from the bad old days of Micro$oft office. This is basically lint for Rust. To call it lint is a bit of a disservice though, as clippy is far more helpful.
How to install clippy
Good news! If you've already installed the toolchain using the default profile, clippy is already installed?
As of rustup 1.20.0, clippy and fmt are included in the default profile. Cool!
Toolchain profiles are a more advanced feature and are well covered in the rustup documentation.
Command line clippy
The simple way to use clippy is via cargo:
$ cargo clippy
    Checking ex1 v0.1.0 (/Users/josh/git/learning-rust/ex1)
warning: unneeded `return` statement
 --> ex1/src/main.rs:5:5
  |
5 |     return y.round() as i32;
  |     ^^^^^^^^^^^^^^^^^^^^^^^^ help: remove `return`: `y.round() as i32`
  |
  = note: `#[warn(clippy::needless_return)]` on by default
  = help: for further information visit https://rust-lang.github.io/rust-clippy/master/index.html#needless_return

warning: `ex1` (bin "ex1") generated 1 warning
    Finished dev [unoptimized + debuginfo] target(s) in 0.85s
You can also have clippy apply the changes for you:
% cargo clippy --fix
    Checking ex1 v0.1.0 (/Users/josh/git/learning-rust/ex1)
       Fixed ex1/src/main.rs (1 fix)
    Finished dev [unoptimized + debuginfo] target(s) in 0.36s
This will modify the code to fix the warnings.
Using clippy with CLion
Navigate to Preferences with <cmd/ctrl-,> or with Clion -> Preferences.
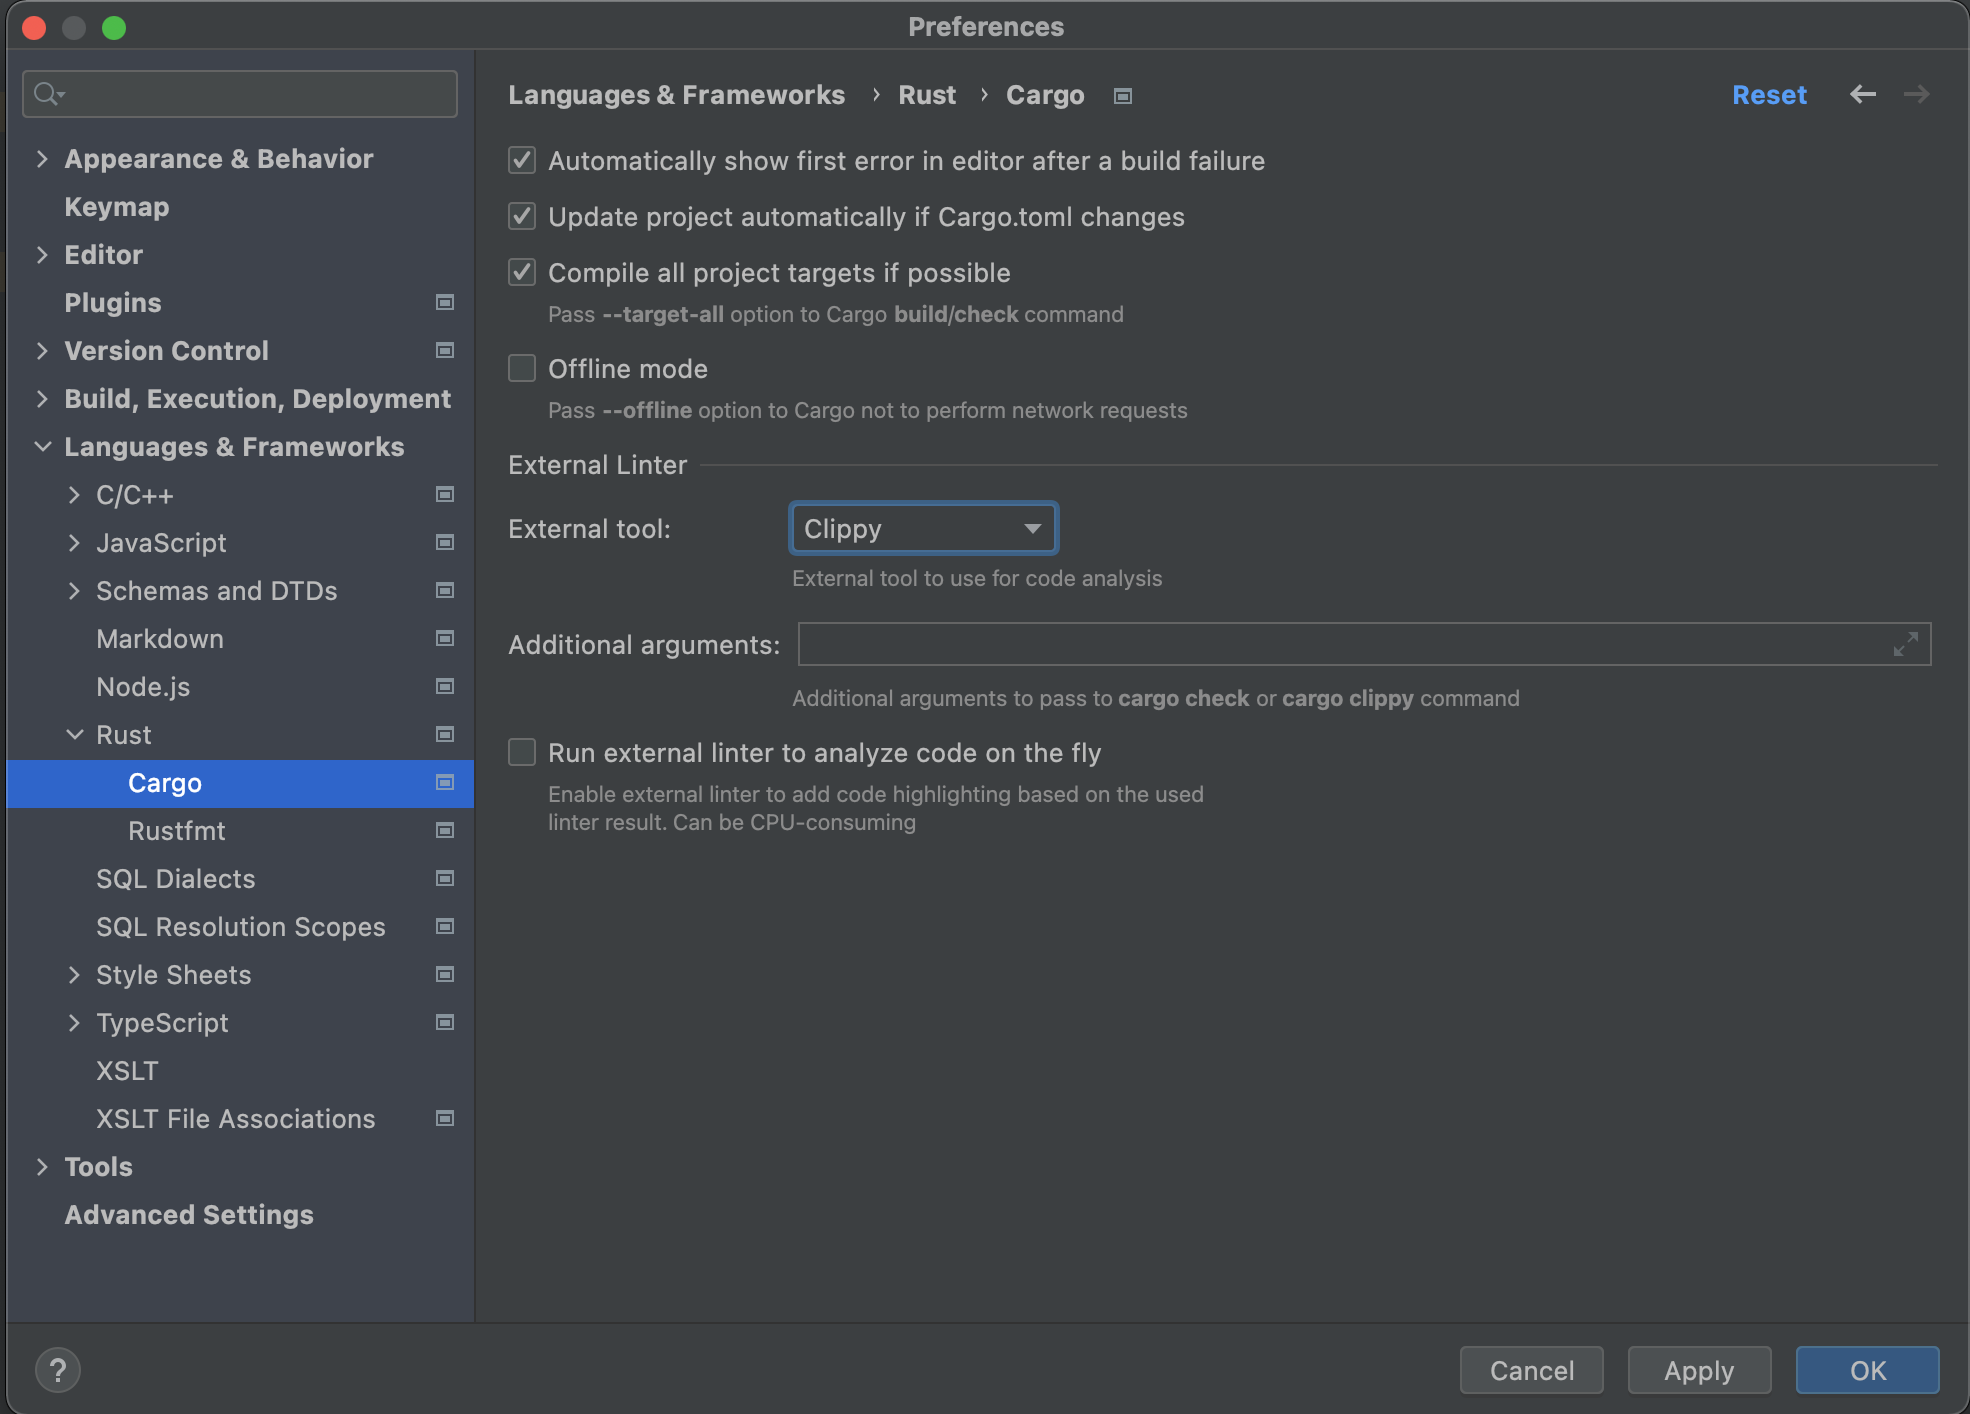
Expand Languages & Frameworks on the left. Expand Rust. Select Cargo.
In the External Linter section, select Clippy.
Optional: Check Run external linter to analyze code on the fly box. For large projects this might not be practical, but for any small / medium projects that a Rust beginner might make it’s pretty useful.
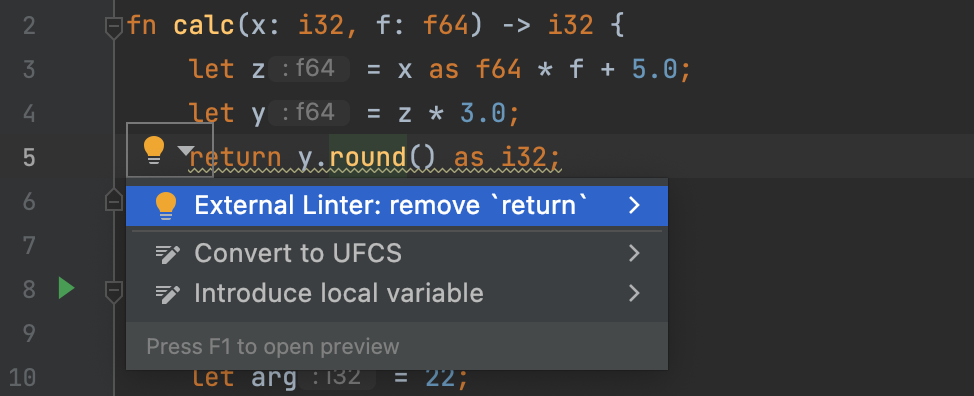
If you do enable Run external linter to analyze code on the fly, you’ll get yellow underlining in the editor that you can interact with to fix the warnings. For example:
clippy is telling us that we don’t need the return statement here. We can just select from the menu and have it apply the fix, similar to what cargo clippy —fix would do:
Rustfmt
The other tool installed as part of the default profile is rustfmt. You can run this on your code before committing to normalize your code formatting. This can be a very simple and effective way to avoid merge conflicts when working as part of a team!
How to install rustfmt
Like clippy , the default installation profile will install rustfmt automatically. So, nothing to do here.
Command line rustfmt
For the default configuration, this is even simpler than clippy:
$ cargo fmtThis will update all the source code in the project to match the standard Rust formatting guidelines. Usually this will happen silently - which makes it perfect for a pre-commit hook for git.
CLion and rustfmt
Very simlar to the setup for clippy:
Navigate to Preferences with <cmd/ctrl-,> or with Clion -> Preferences.
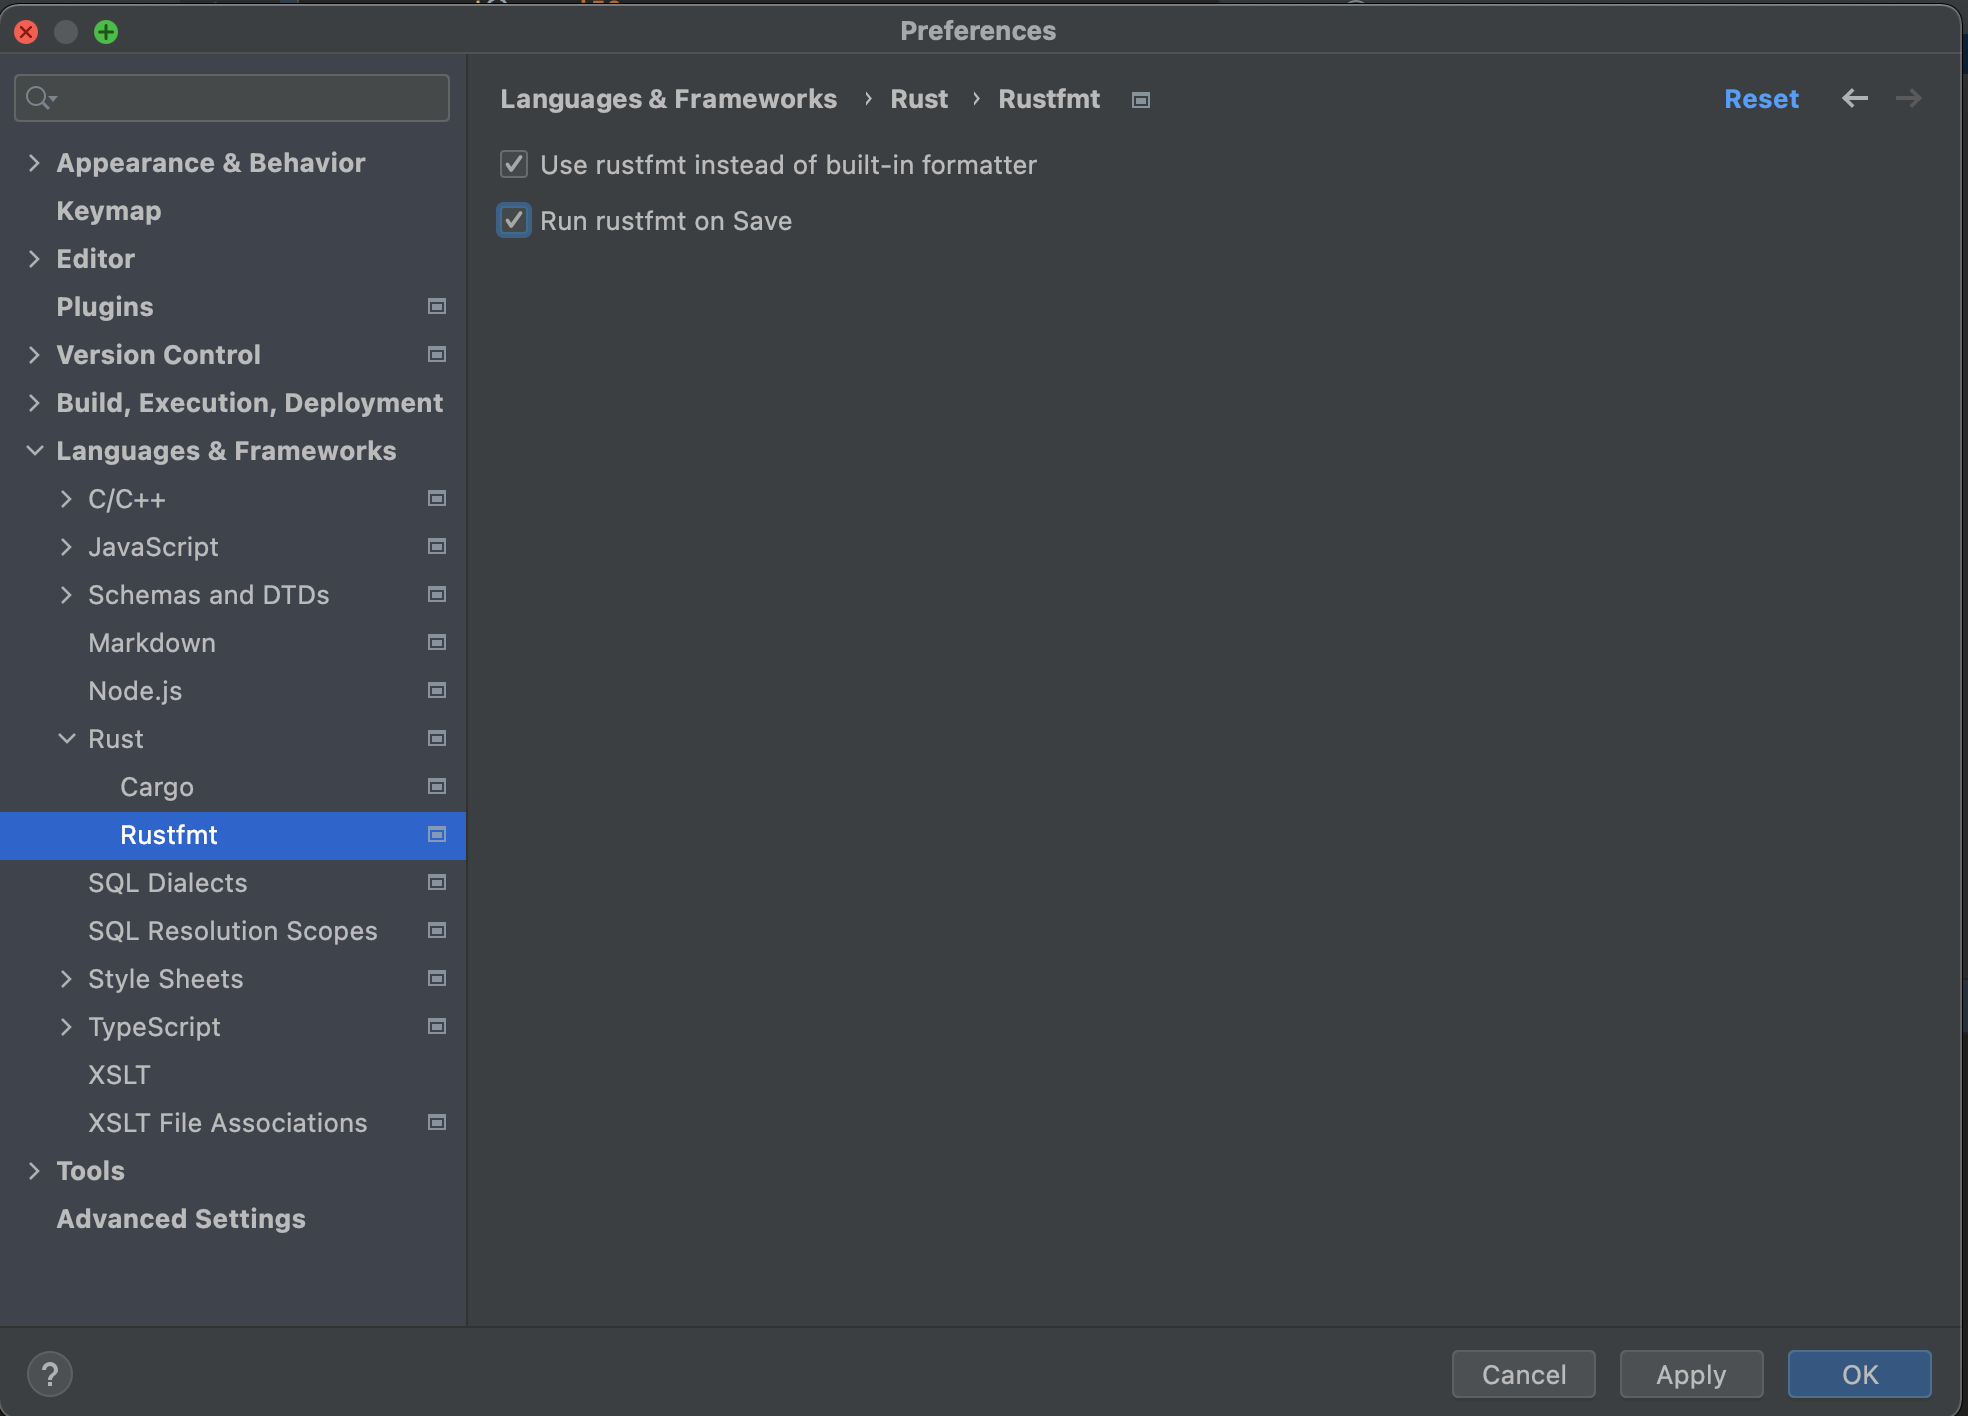
Expand Languages & Frameworks on the left. Expand Rust. Select Rustfmt.
Check Use rustmft instead of built-in formatter and/or Run rustfmt on save
So, why would you want to use rustfmt?
At the moment, there isn’t much of a reason to use it inside CLion, as the built-in formatter seems very similar. However, if you are working on a project where other contributors are using rustfmt, then this is a good option. By using rustfmt you will know for sure that you are using the same formatting rules as everyone else.
Okay, cool. What’s next?
This concludes the basics of the Rust toolchain for now. In the next post I’ll likely cover a practical example. The reason I’m learning Rust in the first place is to experiment with audio plugins and DSP, so I think I’ll start with some building blocks for that purpose.


